

This article will outline the steps to start creating your own API that can be consumed by your application. I will not go into detail about what Lambda functions are, or the intricacies of the AWS Services, for that I would highly recommend checking out their official documentation.
The official documentation is also a great resource if you get stuck somewhere. AWS is constantly changing, and by the time you read this, some steps may be outdated or irrelevant.
I would also recommend trying out your own configuration rather than following this article exactly, as it may help you to better retain the information.
It's also worth noting that these services that AWS provides aren't free, but you may be able to get away with keeping your usage within their free pricing tiers. If in doubt, check the individual pricing pages and keep an eye on your Billing page to make sure you don't accidently pay for something you don't want.
For this example we will be building a basic blog API.
And with that out of the way, let's get started!
Creating the initial database with DynamoDB
DynamoDB is Amazon's recommended NoSQL database, pricing is very competitive and for lightly used API's can be nearly free to use.
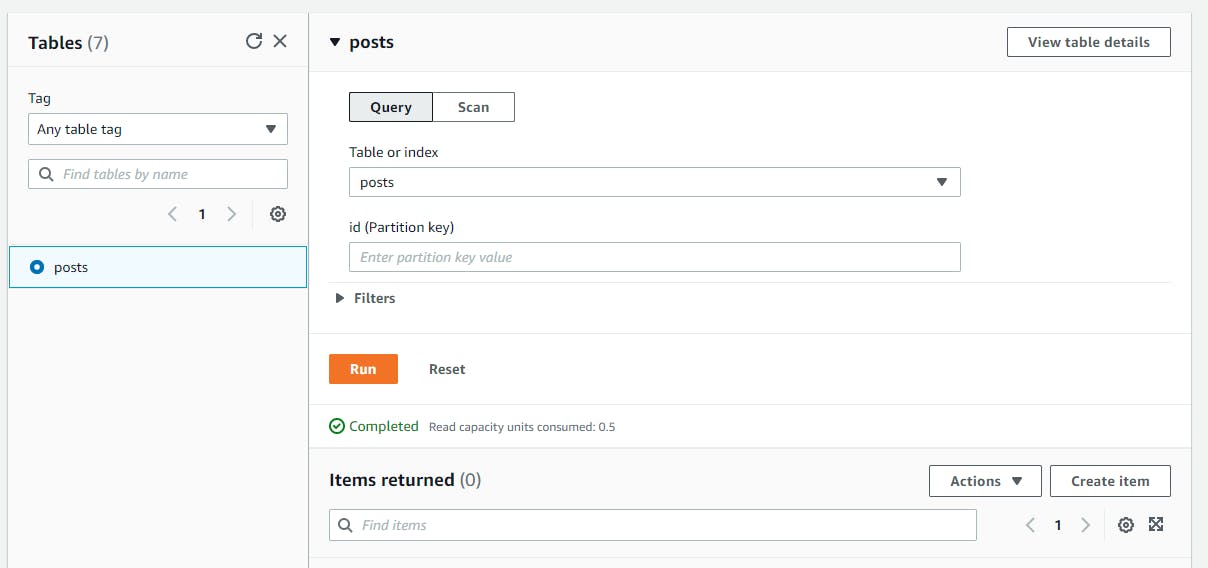
To get started, you will need to create your first table, this can be done by clicking on the orange "Create table" button. The initial screen may look slightly different if you have never used DynamoDB before.
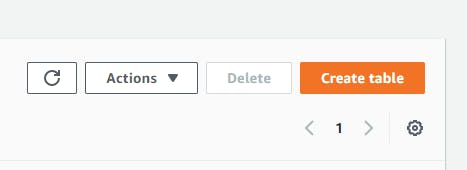
On the create table page, we will need to enter the details, as so:
Table name: posts Partition key: id Sort key: Leave blank Settings: We will use the default settings for this tutorial. Tags: I typically like to bundle the services I create using a common tag, so that I can easily find them in the future, it's not required, but for this example we will create a tag with the key "site", and the value "myawesomeblog.com".
When you're done, click the "Create table" button at the bottom. It should only take a few seconds to create. Once it's done, you can click on the table name you just created to view some more details about it, but for now we're done with this table.
Creating your first Lambda Function
Let's head over to AWS Lambda for this next part. There may be a lot of information that can be confusing or overwhelming during the process of creating this function, it's not necessary to know what everything does, but when in doubt, follow what I have the screenshots and you should be ok.
To get started, click the "Create function" button on the top right, as with DynamoDB, this page might look slightly different if you don't have any Lambda functions currently or have never visited this page before.
If you've used AWS in the past, there may already be a few functions in your account. It's safe to ignore them, and I wouldn't touch them, unless you know what you're doing.
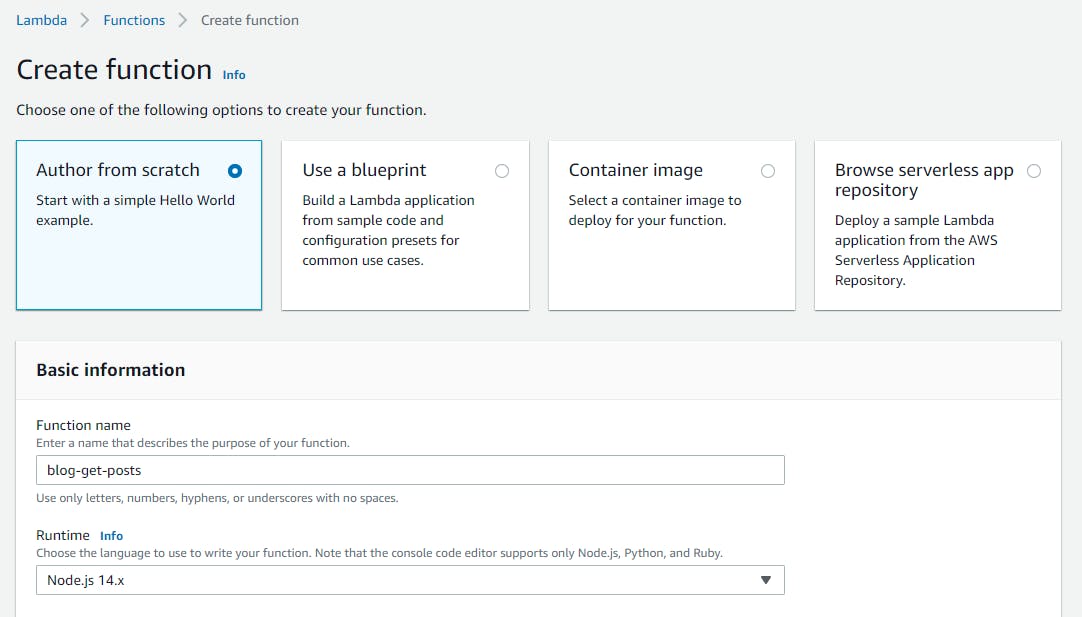
We're going to create this function from scratch, so select "Author from scratch" on the new page.
For the function name, we're going to be very specific with what this function does, so we're going to name it "blog-get-posts".
For runtime, as of the time of writing this article the default is "Node.js 14.x", we're going to leave that default as it is perfect for what we need.
Below that we will get to the permissions section. I like to create a new role for each of my lambda functions, that handle a specific task, and only has access to that task.
Click the dropdown to "Change default execution role", you'll be given 3 different options, for this we will select "Create a new role from AWS policy templates", below that we will name this role as so: "blog-get-posts-role".
Below the name we can select the policy template for the role. Click on the dropdown, and at the top of the dropdown you can search for "Simple microservice permissions" and click on it. It should be added right below the dropdown as a list of services this function is allowed to use.
If you plan on using any other services when you create your own functions, make sure to add them here.

We don't need to change anything in the advanced settings, so we can go ahead and click the "Create function" button at the bottom.
Once the function is created, you'll be taken to that functions page. There's a lot of information here, but for our needs, we will only need to change the code at the bottom of the page in the "Code source" window.
In this window there will be an index.js, and in the file there's some code, but we don't need any of it. We will replace the code with this:
const AWS = require("aws-sdk");

const dynamo = new AWS.DynamoDB.DocumentClient();

exports.handler = async(event, context) => {
  let body;
  let statusCode = 200;
  const headers = {
    "Content-Type": "application/json"
  };

  try {
    body = await dynamo.scan({
      TableName: "posts"
    }).promise();
  }
  catch (err) {
    statusCode = 400;
    body = err.message;
  }
  finally {
    body = JSON.stringify(body);
  }

  return {
    statusCode,
    body,
    headers
  };
};
If you happened to use a different name for your DynamoDB table, make sure you change the table name in the try block to reflect whatever name you chose.
Once you're done click the "Deploy" button near the top of this window, and now we are done creating our Lambda function.
Creating the API Gateway
Use the search bar at the top of the AWS console to search for API Gateway, and then click it to get started.
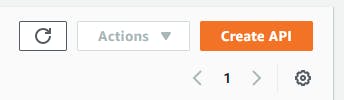
Just like before, you will want to click the "Create API" button on the top right.
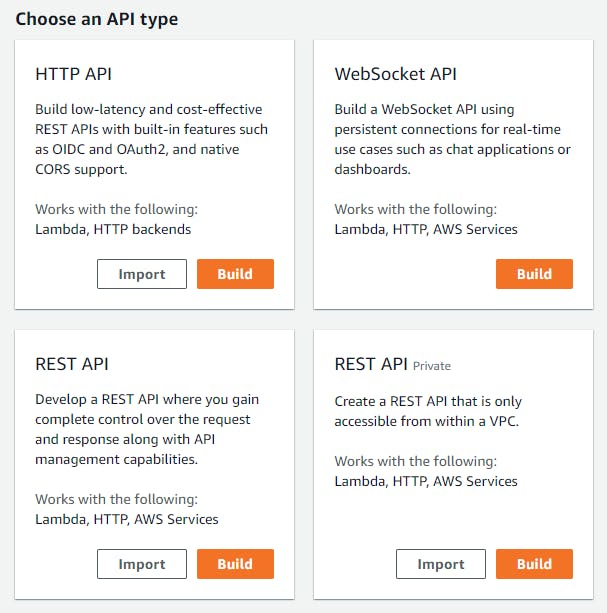
You will be given some options for what type of API you want to create, we will be creating an HTTP API for this tutorial, so click the "Build" button for it.
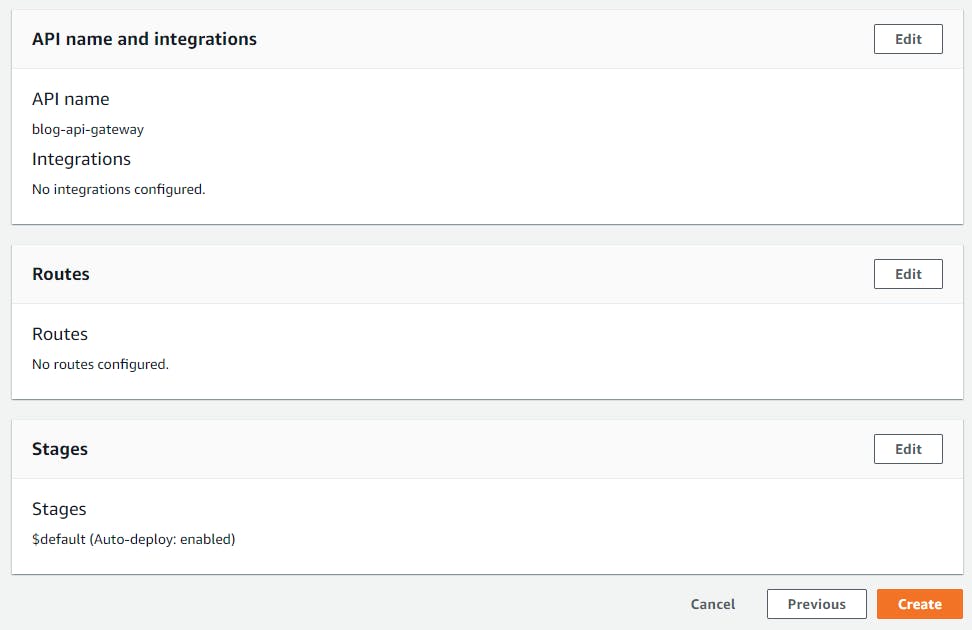
The next page you will enter the name of the API, we will call this, "blog-api-gateway". We can ignore the integrations section for now. Click Next.

On the configure routes page, there's nothing to do at the moment so click Next.
On the stages page, the defaults are fine, so click Next.
Review your changes on the next page and click Create to finish this step.
Once the next page loads, you'll be inside your newly created API Gateway, take note at the invoke URL in the Stages window, this will be the URL you use to access your API. You can go to this URL in your browser and it should give you a message similar to this:
{"message":"Not Found"}
That's because currently there's no routes attached to this API, so lets get that fixed.
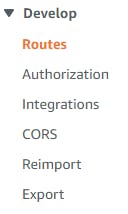
On the left sidebar under the "Develop" heading there should be a routes link, click on it.
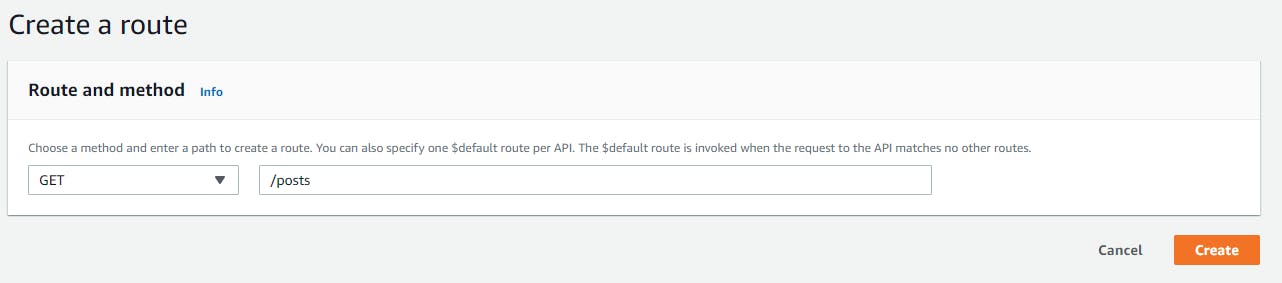
On the routes page, click the create button to create your first route.

On the new page, you will need to select the method you want to use, and the path for the route, select the "GET" method, and use the path "/posts", then click Create.
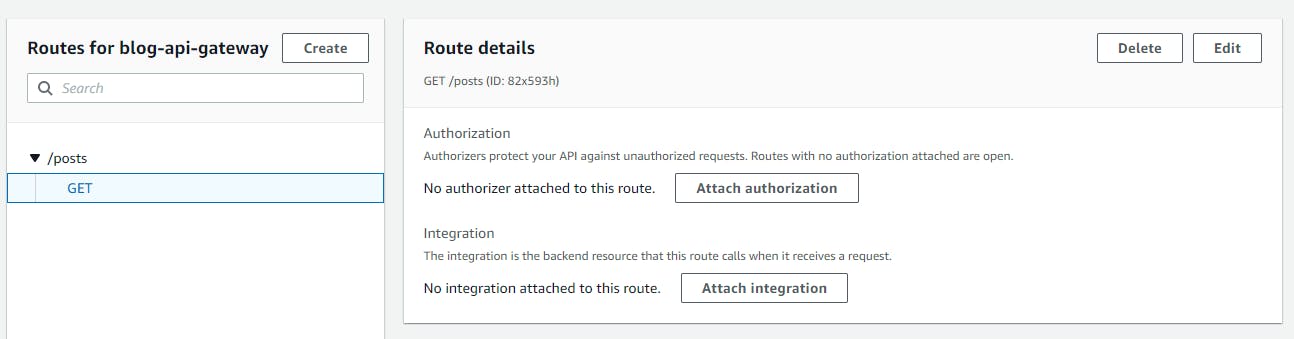
We have one more step to do before we can begin using this route, and that's attaching the route to the lambda function we created earlier. In the Routes window you should see the /posts route we just create, click on the "GET" method here and it will bring up a new window where we can do this.
Click the "Attach Integration" button, and then on the next page click the "Create and attach integration" button.
Leave the route as is, it should be pointing to "/posts" still. Under integration target, click the dropdown and select "Lambda Function". Below that there should be the integration details window, make sure the AWS Region is the same as what you created your Lambda function in before, it should be automatically set correctly.
Next to that you can search for your function, start typing blog and you should see it popup, go ahead and select "blog-get-posts".
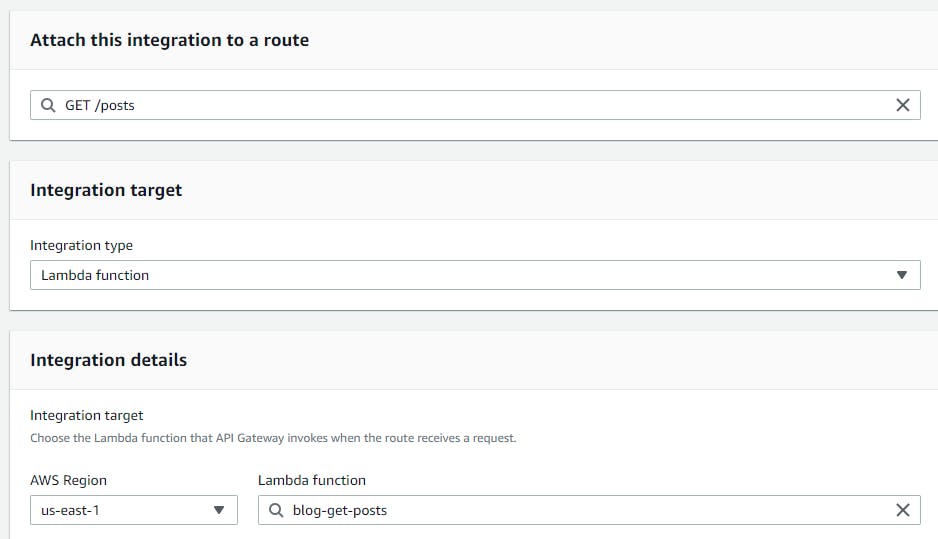
The rest of the defaults are fine and we can go ahead and click Create.
Now we are ready to start playing around.
Take the invoke URL you had before, and go to that URL with "/posts" appended to it, you should now see a different message.
{"Items":[],"Count":0,"ScannedCount":0}
If you the same thing, then that means it's working, but there's no items in our DynamoDB table, so nothing is returned.
Let go back to the DynamoDB service and add some items to our table.
AWS has been updating the DynamoDB dashboard a lot over the last few weeks, so it may be slightly different than these screenshots, but you should see a "Items" link on the left sidebar. Click it to go to our list of tables.
On the left side of this page, in the tables window, select the "posts" table we create previously. This should bring up some details about the table, and the tables contents. Go ahead and click the "Create item" button on the bottom right.
Now we can enter the details for our first blog post. The only field that is required is the partition key we created when the table was first created, enter anything you want here, but it must be unique. For this example we're going to make the id be a slug of the title. For the rest of the fields, you can enter whatever you want, but we're using these:

Once you're satisfied, click the "Create item" button.
Now if we go back to our API endpoint and try it again, you should get something new:
{"Items":[{"id":"hello-world","title":"Hello, world!","body":"Hurray, the API works!"}],"Count":1,"ScannedCount":1}
And with that, we have a very basic HTTP API that you can further extend to handle more methods, such as a PUT method to create a new post, and a DELETE method that deletes a post. Most of the steps for routes like these would be the same you would only need to use different code in your new Lambda function, and the appropriate method on your API routes.
Part two of this article will cover how to create additional routes, and will be available soon!